Y
our RV is your home on wheels, your weekend escape, and maybe even your full-time lifestyle. That’s why protecting the exterior is important. You will need to preserve the structure and prevent long-term damage to save yourself from costly repairs down the road.
Exposure to sun, rain, snow, dirt, and road grime can wear down your RV’s finish faster than you might think. And without proper care, even minor issues like fading paint or cracked seals can lead to bigger headaches like leaks, rust, or delamination.
Long-Term Value of Exterior Maintenance
Taking care of your RV’s exterior is one of the smartest ways to protect its long-term value. When the outside looks good, it gives buyers confidence that the inside has been well maintained, too. A clean, well-kept exterior also helps slow down wear and tear that can impact resale down the line.
Here’s how long-term maintenance pays off:
- The resale value increases over time: A clean and well-maintained RV stands out in the used market, often selling quicker and at a higher price than one that shows signs of neglect.
- Repair costs stay low: Regular inspections and upkeep help catch small issues early before they lead to expensive problems like leaks, rust, or structural damage.
- Exterior materials last longer: Protective steps like waxing, sealing, and using proper cleaning products reduce wear and extend the life of your paint, trim, and decals.
- Your RV continues to look its best: Ongoing care keeps the exterior clean, shiny, and free from fading, making it more enjoyable to use and more attractive to future buyers.
- Moisture-related damage is avoided: Sealing cracks and maintaining weatherproofing keeps rain and humidity out, protecting the interior from mold, rot, and water damage.
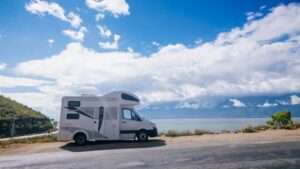
How to Prevent UV Damage to Your RV’s Exterior
Sun exposure is one of the biggest threats to your RV’s exterior. Over time, UV rays can fade paint, crack decals, dry out rubber seals, and weaken protective coatings. If left unchecked, this damage not only affects appearance but also shortens the lifespan of key materials.
Prolonged sun exposure can cause paint oxidation, which gives your RV a dull, chalky look. Vinyl graphics may start to peel or discolor, and roof sealants can dry out and lose flexibility. Once these areas break down, moisture can find its way inside, leading to more costly problems.
UV damage can begin to show in as little as one year if the RV is stored outdoors with no protection. RVs left uncovered in direct sunlight can experience up to 40 percent faster material degradation than those regularly shaded or treated with UV-resistant products.
Here are effective ways to prevent sun damage and keep your RV looking great:
- Invest in a high-quality, UV-resistant RV cover: A good RV cover protects against direct sunlight, dust, and harsh weather. Choose a breathable cover designed for your specific RV type to prevent mold buildup and reduce fabric strain. Look for covers with reinforced corners, vent panels, and secure straps to keep them in place during wind or storms.
- Apply a UV-protectant wax or sealant at least twice a year: Using wax or a synthetic sealant formulated for RVs adds a barrier that reflects harmful UV rays. It helps maintain the shine, slows down fading, and protects the topcoat from cracking. Apply it evenly after a thorough wash, and reapply based on your RV’s exposure and the product’s durability.
- Store your RV in shaded or covered areas whenever possible: Keeping your RV under a carport, canopy, or inside a covered storage unit dramatically reduces sun exposure. Even partial shade from trees or buildings helps cut down on UV damage during the hottest parts of the day.
- Treat rubber seals, gaskets, and tires with UV conditioners: Rubber and vinyl components are especially vulnerable to drying and cracking under the sun. Untreated rubber can start to crack within 12 to 18 months, especially in dry or sunny climates. Use a non-petroleum-based protectant to condition slide-out seals, window gaskets, tire sidewalls, and plastic trim. Regular treatment helps these parts stay flexible and last longer.
- Wash the RV regularly to remove surface buildup: Dust, bird droppings, and road grime can bake into your RV’s surface under direct sunlight. A gentle wash with RV-safe soap every few weeks removes buildup that can damage the finish and weaken any protective layers you’ve applied.
Protecting Your RV from Rain, Snow, and Moisture Damage
Moisture is one of the most damaging forces your RV can face. Rain, snow, and humidity work their way into seams, roof joints, and window seals. Over time, even small leaks can lead to mold, mildew, rot, or soft spots that cost thousands to repair.
Here are the most effective ways to taking care of your RV from moisture damage:
- Inspect and reseal all exterior seams regularly: Seams around windows, doors, roof vents, and slide-outs are common entry points for water. Check these areas at least every three to six months for cracking, peeling, or soft spots. Apply RV-safe sealant as needed to keep moisture out. A good seal can last one to three years, depending on exposure and climate.
- Check the roof at least twice a year: Your RV roof takes the brunt of rain, snow, and ice. Look for soft spots, cracks, or signs of aging, especially around vents and skylights. If your RV has a rubber roof, treat it regularly with a UV-protective conditioner.
- Use a properly fitted RV cover during long-term storage: A waterproof, breathable cover helps block rain and snow while allowing moisture to escape. Units covered during winter show fewer signs of mold or staining than uncovered storage. Choose a cover made specifically for your RV class to ensure full coverage and secure fit.
- Keep gutters, awnings, and slide toppers clean and clear: Debris can trap moisture and lead to pooling water along the roofline or around slide-outs. Clean out leaves, twigs, and dirt regularly to help water drain away properly. Blocked drainage systems are a common cause of water entering through hidden seams.
- Ventilate the interior during storage or downtime: Use moisture-absorbing products inside your RV during periods of non-use, especially in humid climates. Open vents or crack a window slightly if it is safe to do so. Trapped humidity can cause interior mold even if the exterior is sealed.
- Avoid parking directly under trees in wet seasons: Tree sap, falling leaves, and pooling rainwater on the roof can accelerate damage and increase the risk of leaks. Choose covered or open storage whenever possible to reduce exposure to falling debris and moisture buildup.
Cleaning Your RV Exterior Without Damaging It
Cleaning your RV exterior might sound like a big job, but it doesn’t have to take all day. With the right tools and a simple routine, you can get it done in about two to three hours for a full-size motorhome and even less for smaller rigs. Most of that time goes into rinsing, scrubbing, and drying. But, when done properly, you only need to do a deep clean every few weeks.
Step 1: Rinse Off Loose Dirt and Debris
Before applying any cleaner, thoroughly rinse your RV from top to bottom. Use a standard garden hose with a wide spray nozzle. This loosens dust, dirt, bird droppings, and tree sap that can scratch the surface during scrubbing.
Start with the roof and let water flow down the sides so you’re not pushing dirt into already-cleaned areas. Avoid pressure washers. While they seem convenient, they can force water into vents and seams, damage decals, or even strip sealant off joints and trim.
Step 2: Use an RV-Safe Soap
Choose a cleaning product labeled specifically for RVs, gel-coated surfaces, or fiberglass exteriors. These soaps are gentle on protective coatings and won’t strip away wax. Avoid dish soap or car wash products containing degreasers or harsh chemicals.
Mix the soap in a large bucket of water according to the label instructions. Work in small sections to prevent streaking and drying.
Step 3: Scrub with a Soft-Bristled Brush or Mitt
For larger surfaces, use a telescoping RV brush with soft bristles or a microfiber wash mitt. Switch to a smaller brush or soft sponge for tighter spaces and trim.
Scrub using light and circular motions, applying only enough pressure to lift grime. Always move from top to bottom to prevent dirty water from running over clean areas. Be extra gentle around decals, vents, or painted graphics. These areas are more prone to wear from friction.
Step 4: Clean the Roof Safely and Thoroughly
Your RV’s roof collects the most dirt, mold, sap, and stains, especially if it is parked near trees. Using a roof-safe cleaner and a soft scrub brush, clean the entire surface carefully. Focus around roof seams, vent covers, AC units, and skylights, where buildup tends to collect.
Take safety precautions like non-slip shoes and a spotter if your roof is walkable. If not, use an extendable brush from a ladder. A clean roof helps prevent black streaks from running down the RV’s sides.
Step 5: Rinse Off All Soap Residue
After each section, rinse thoroughly with clean water. Soap that dries on the surface can leave behind a chalky film and cause streaking.
Work methodically across each side of the RV to ensure no residue is left behind. After you’ve washed all areas, use a final full-body rinse from top to bottom.
Step 6: Dry the Surface to Prevent Water Spots
Letting water air dry can leave behind mineral spots and streaks, especially in sunny or hard water areas. Use large microfiber towels or a silicone water blade to gently remove excess water.
Start from the top and work your way down for a clean, spot-free finish. Drying also helps you inspect the surface more closely and catch any small imperfections or problem areas you might have missed.
Step 7: Apply Wax or Sealant After Drying
Once your RV is completely dry, apply a coat of wax or sealant formulated for RV exteriors. These products protect against UV rays, rain, and road grime. Use a microfiber applicator to apply a thin, even layer, then buff it off with a clean towel. RVs that are waxed twice a year show less surface oxidation and fading over time compared to those that aren’t treated.
Step 8: Clean the Details and Hardware
Finish up by wiping down mirrors, windows, handles, light covers, and trim using glass cleaner or plastic-safe products. These areas often collect grime and fingerprints and are usually the first thing people notice.
Clean your wheels, hubcaps, and tires using a non-abrasive cleaner. You can also apply a UV protectant to tire sidewalls to help prevent cracking and sun damage.
If you’d rather skip the hassle of doing it yourself, RecNation offers professional RV and boat cleaning services through trusted vendors. These services include full exterior washes, waxing, tire shine, window cleaning, and even roof and awning care.
Interior options are also available, including surface sanitizing, kitchen and bathroom cleaning, and floor-sweeping. These services are perfect for returning from a long trip or prepping for the next one. Services are available in multiple states and can be scheduled directly through RecNation’s website.
Best Way to Apply Coating Wax and Seal Your RV Exterior
Waxing and sealing your RV exterior is one of the best ways to protect it from the elements. A good wax creates a barrier against UV rays, rain, and road grime, while a sealant adds long-lasting protection that can help preserve your RV’s finish for years. Together, they keep the exterior looking newer and reduce the risk of fading, chalking, or oxidation.
Start by choosing the right product for your RV’s surface. If you have a fiberglass or gel-coated exterior, use a wax specifically made for that material. Painted metal surfaces do well with a high-quality automotive wax or a synthetic polymer sealant. Spray waxes are easy to use and work well for quick touch-ups, but liquid and paste waxes offer stronger protection. Sealants, especially polymer-based ones, tend to last longer.
Make sure the RV is clean and completely dry before you begin. Any dirt or residue left on the surface can cause streaking or interfere with the bond. Work in small sections using a foam pad or microfiber applicator, applying a thin, even layer.
After letting it set according to the product’s directions, buff it off with a clean microfiber towel. Avoid waxing in direct sunlight, as high heat can cause the wax or sealant to dry too quickly and leave behind a cloudy finish.
Focus your attention on the areas that take the most abuse, like the front cap, roofline, slide-out tops, and trim. These spots are constantly exposed to sun, wind, and road spray and benefit the most from an extra layer of protection.
How often you wax or seal depends on how and where you store your RV. Those parked outdoors year-round or used frequently may need a new coat every two to three months. If you use a polymer sealant, you may get four to six months of coverage.
A consistent waxing and sealing routine keeps your RV looking sharp, helps protect your investment, and reduces long-term wear. With just a few hours of work a couple of times a year, you can keep your exterior in top shape and own your RV for a longer period.
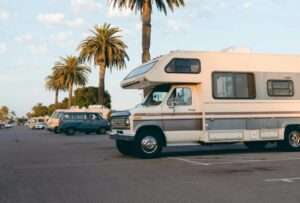
Storage Tips to Preserve Your RV’s Exterior Finish
Where and how you store your RV significantly affects how well the exterior holds up over time. Exposure to sun, rain, snow, and debris can wear down the finish, fade paint, and crack seals if not properly managed. Smart storage habits help prevent this damage and keep your RV looking newer for longer.
Whether you store your RV for a season or just between trips, these tips can help preserve the finish and reduce long-term wear:
- Store your RV under cover whenever possible: Covered storage protects against UV rays, bird droppings, tree sap, and moisture buildup. Indoor storage offers the best protection, but even a quality carport or RV canopy can significantly reduce sun damage and rain exposure.
- Use a breathable, waterproof RV cover: If storage is unavailable, invest in a properly fitted RV cover. Choose one made of breathable, weather-resistant material that prevents moisture buildup underneath. RVs kept under protective covers show fewer exterior issues over time.
- Clean the exterior before storage: Dirt, road salt, and tree sap can eat into paint and clear coat when left sitting. Always wash and dry your RV before long-term storage to prevent staining or surface damage.
- Apply wax or sealant before storing: A fresh coat of wax or sealant adds a layer of defense against UV rays and moisture. Treated surfaces hold up better during seasonal downtime, especially when stored outdoors.
- Check and seal roof seams and vents: Before storing, inspect the roof for cracks, dried sealant, or loose seams. Water can seep in slowly over time, especially with snow or pooled rain. Reseal as needed to block moisture and avoid interior water damage.
- Avoid parking under trees: Branches, leaves, and sap cause exterior wear and increase the risk of roof staining or damage. Choose an open, level space to keep debris away from the roof and sides when possible.
- Use tire covers and protect exterior rubber: UV rays break down rubber quickly, especially during long-term storage. Cover your tires and treat rubber seals with a UV conditioner to prevent drying, cracking, and splitting.
- Ventilate the interior slightly: While not directly related to the exterior, keeping the air flowing helps control moisture levels and prevents mold growth that can eventually spread to seals and window frames.
Final Verdict
Taking care of your RV’s exterior does not have to be complicated. A consistent routine of washing, waxing, sealing, and smart storage goes a long way in keeping your rig looking great and holding its value. With a few practical habits and the right products, you can prevent damage from sun, moisture, and dirt before it starts.
Your RV is an investment and a gateway to the outdoors. Protecting the exterior means fewer repairs, better performance, and more time enjoying the road ahead. A little effort now can save you thousands later and keep your RV ready for every adventure that comes next.
Protecting your RV’s exterior takes a mix of routine care, the right products, and smart storage decisions. Whether you are looking for professional cleaning, exterior detailing, or a secure place to store your RV, RecNation makes it easier. With expert cleaning partners and reliable storage options across the country, they help you take the guesswork out of RV care.
FAQ
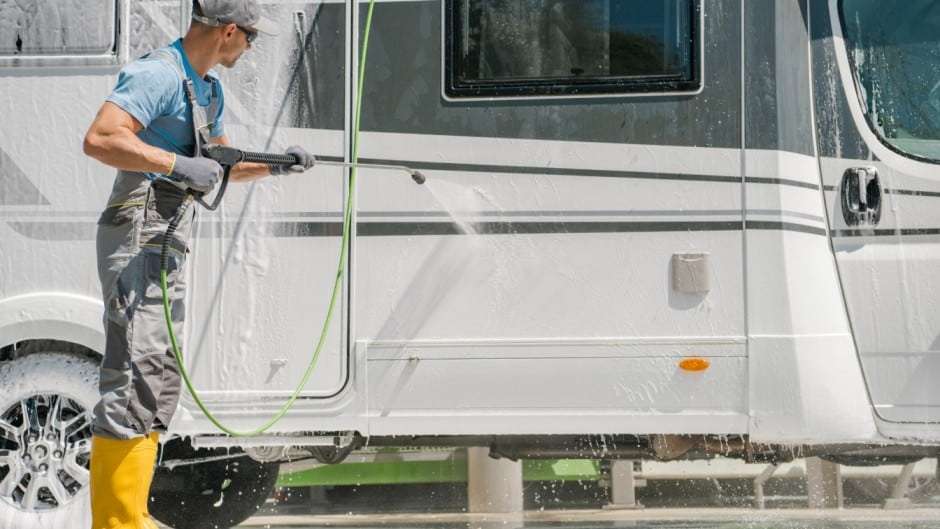
Can I use a pressure washer on my RV?
It’s best to avoid using high-pressure washers on your RV exterior. They can damage seals, force water into vents or gaps, and peel off decals. A soft spray from a garden hose with a wide nozzle is safer and more effective for routine cleaning.
How do I protect my RV graphics from cracking or peeling?
Avoid harsh scrubbing to protect decals and graphics, and never use abrasive cleaners. Regular waxing and using UV protectants designed for vinyl will help prevent fading and cracking. Parking in shaded or covered areas also reduces sun damage.
What’s the best way to clean bug splatter off the front of my RV?
Use a bug remover product that’s safe for RV finishes, and let it soak for a few minutes before wiping. A microfiber cloth or soft brush works best. Clean bug splatter promptly, as it can etch into paint or decals if left too long.