Winterizing a jet ski means draining water from the cooling system, fogging the engine, treating the fuel, removing the battery, and getting the ski into proper storage before temperatures fall below 40°F. If you’ve never done it before, the process sounds more complicated than it is. Most owners finish the job in a Saturday afternoon with under $50 in supplies and basic hand tools.
This guide covers every step in order, including brand-specific differences for Sea-Doo, Yamaha WaveRunner, and Kawasaki owners, plus what to do with the ski once winterization is complete. If you’re storing a boat alongside your jet ski, how long a boat can sit without being started covers the same seasonal maintenance logic for a different engine type.
Why Winterizing a Jet Ski Is Worth the Effort
Water left inside the cooling system doesn’t just sit there harmlessly over winter. When temperatures drop below 40°F, that trapped water freezes and expands. The engine block and exhaust manifold take the most force from that expansion and can crack under the pressure.
The cost of freeze damage runs $1,500 to $3,000 or more depending on which components fail. That’s a significant repair bill against a $50 prevention kit.
What Happens If You Skip Winterization
Freeze damage is the most serious failure, but it’s not the only one. Here’s what you’re risking if you skip the process:
- Cracked engine block or exhaust manifold: Repair costs start around $1,500 and can exceed $3,000 for major splits.
- Fuel system corrosion: Ethanol-blended fuel (E10, the standard at most US pumps) begins to phase-separate in as little as 30 days. The NMMA fuel storage guidelines confirm that phase separation causes corrosion in marine fuel systems and clogs carburetors or fuel injectors.
- Dead battery: A jet ski battery left connected and unattended through winter will discharge completely. A deeply discharged battery often won’t recover, meaning a replacement at $80 to $200 in spring.
- Corroded seals and cables: Moisture trapped in fittings and control cables over winter accelerates corrosion and creates stiff or unresponsive controls by the time riding season returns.
Even owners in Florida or Southern California aren’t off the hook. Cold freeze risk may be lower, but fuel degradation happens regardless of temperature.
What You Need Before You Start
Gather everything before you start the job. One trip to a marine supply or hardware store covers most of this list.
- Marine-grade fuel stabilizer: Dose at the ratio on the label (typically 1 oz per gallon). Do not substitute automotive stabilizer.
- Fogging oil or fogging spray: Protects engine cylinders from rust during long-term storage.
- Non-toxic propylene glycol antifreeze: Required for some models. Do not use automotive ethylene glycol antifreeze on a personal watercraft (PWC).
- Garden hose with a flushing attachment: Required for open-loop cooling systems (Yamaha WaveRunner, Kawasaki). Not for Sea-Doo closed-loop systems.
- Battery tender or trickle charger: Keeps the battery at a healthy charge over winter without overcharging it. The same principle applies to how long a car battery can sit unused, though a PWC battery’s smaller capacity means it needs attention sooner.
- UV-resistant, breathable jet ski cover: Breathable fabric prevents moisture buildup under the cover.
- Ratchet straps: For securing the ski on a trailer during storage.
- Basic hand tools: Socket set for battery terminals, spark plug socket for cylinder fogging.
- Owner’s manual: Keep it on the workbench throughout the process.
Total supply cost is typically under $50 if you already have hand tools.
Know Your Cooling System Type Before You Buy Supplies
This distinction matters before you buy anything. Sea-Doo models use a closed-loop cooling system on many newer units. A closed-loop system does NOT use a garden hose flush the way open-loop Yamaha WaveRunner and Kawasaki systems do. Running a garden hose attachment through a closed-loop system can damage it.
Check your owner’s manual or the manufacturer’s website to confirm your system type before purchasing a flushing attachment or antifreeze.
How to Winterize a Jet Ski, Step by Step
Work through these steps in order. Each one sets up the next.
- Flush the cooling system. For open-loop systems (Yamaha WaveRunner, Kawasaki), connect the garden hose flushing attachment to the flush port and run clean water through the engine for two to three minutes with the engine idling. This purges salt, sediment, and mineral deposits. For closed-loop Sea-Doo systems, skip the garden hose and follow the BRP-specified antifreeze procedure in your owner’s manual.
- Run the engine briefly to expel remaining water. After flushing, let the engine run for 30 seconds without the water supply connected. This pushes any remaining water out of the exhaust and cooling lines before it can freeze.
- Add fuel stabilizer to a full tank. Fill the tank with fresh fuel before adding marine-grade fuel stabilizer at the manufacturer’s dosing ratio. A full tank prevents condensation from forming inside the fuel system. If non-ethanol fuel is available at your marina, use it. If not, E10 with properly dosed stabilizer is acceptable.
- Fog the engine. With the engine running, spray fogging oil directly into the air intake for 10 to 15 seconds until the engine starts to smoke slightly. Then remove the spark plugs and spray fogging oil into each cylinder. Reinstall the plugs to the torque spec in your owner’s manual.
- Change the oil and filter if due. Old engine oil carries combustion acids. Leaving acidic oil sitting against engine internals over winter accelerates wear. Check your service interval and change it now if it’s within range.
- Inspect and treat the hull. A hull inspection at this stage catches cracks, dings, or blistering before they worsen over winter. Apply marine grease or a corrosion inhibitor spray to exposed cables, fittings, and control linkages for moisture and corrosion protection.
- Remove the battery. Disconnect the negative terminal first, then the positive. Clean both terminals and store the battery somewhere dry and temperature-stable. Connect it to a battery tender to maintain the charge over winter. Do not skip this step for long-term storage.
- Cover the exhaust outlet. Stuff a rag or foam plug into the exhaust opening. This keeps insects, mice, and moisture out of the exhaust manifold over winter. Write a note to yourself to remove it before spring startup.
- Clean the hull and drain the bilge. Rinse the exterior hull thoroughly and use the bilge pump to drain any water from the bilge. Leave the drain plug out while the ski is on the trailer so residual water can escape completely.
- Cover the ski and move it into storage. Fit the jet ski cover snugly and secure it. The ski should sit on a trailer or a purpose-built storage stand, not on bare ground.
Sea-Doo Winterization Notes
Sea-Doo models use a closed-loop cooling system on many current and recent-generation units. BRP specifies its own antifreeze flushing procedure rather than a garden hose flush. Consult the BRP Sea-Doo owner’s manual for your model year before starting. Skipping manufacturer-specified winterization steps can affect factory warranty coverage on skis still within the warranty period.
Yamaha WaveRunner Winterization Notes
Yamaha WaveRunner models use an open-loop cooling system that requires flushing the cooling system with fresh water via the garden hose flushing attachment. Yamaha recommends applying fogging oil through the air intake while the engine runs. Check the Yamaha Marine owner’s manual for model-specific torque specs when reinstalling spark plugs.
Kawasaki Jet Ski Winterization Notes
Kawasaki’s open-loop cooling system follows a similar flush process to Yamaha’s, but antifreeze application requirements differ by model year. Kawasaki’s factory warranty terms include seasonal storage maintenance as an obligation. Owners with newer models should verify their specific requirements in the Kawasaki service manual before skipping any step.
DIY vs. Professional Winterization: What It Actually Costs
DIY winterization costs under $50 in supplies for most owners who already have basic hand tools. Professional winterization at a marine dealership or PWC service shop runs $350 to $750 depending on your location, the ski’s model, and whether an oil change is included. Our guide to storage costs covers related seasonal vehicle expenses worth factoring into your full ownership budget.
| Factor | DIY | Professional |
| Cost | Under $50 in supplies | $350 to $750 |
| Time | 3 to 4 hours | Drop off and pick up |
| Skill required | Basic mechanical comfort | None required |
| Documentation | Self-managed | Dealer records kept on file |
| Best for | Out-of-warranty ski, confident owner | Warranty-active ski, first-time owner, high-value performance model |
DIY is appropriate for most owners whose ski is out of warranty, who are comfortable following a checklist, and who have an afternoon available. Professional service makes sense when the ski is still under factory warranty (dealer records protect that coverage), when you’re not confident in the cooling system flush procedure, or when the ski is a high-value performance model where a mistake is expensive.
What a Shop Winterization Service Typically Includes
A $350 to $750 service typically covers the engine flush, fogging, fuel stabilization, battery service, cable and seal treatment, and a general inspection. Some dealers include an oil change. Ask whether the shop offers a combined winterization and spring startup package. For owners who want a fully hands-off approach, pricing out both services together is worth the call.
Where to Store a Jet Ski After Winterization
Winterization protects the ski from the inside. Where it spends the next four to five months determines how well the outside holds up. You have three realistic options, and the tradeoffs are similar to the ones covered in our breakdown of covered outdoor storage versus street parking for cars.
Home garage or covered driveway is the most convenient choice if you have the space:
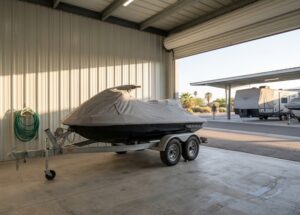
- The ski should sit on a trailer or storage stand, covered with a breathable jet ski cover, with airflow underneath it.
- Keep the battery tender accessible, since you’ll want to check it periodically.
- This option costs nothing beyond the cover and battery tender you already bought.
Outdoor storage at home works in mild climates with a quality cover and a trailer. UV exposure and temperature swings accelerate wear on the hull and cover over a full winter, and the ski shouldn’t sit directly on bare pavement without a trailer. If your HOA (homeowners association) restricts vehicle storage, outdoor storage at home may not be permitted at all, the same zoning and covenant issue covered in our guide on whether you can park an RV next to your house.
A dedicated vehicle storage facility offers the most protection for owners without covered home parking, those in HOA-restricted communities, or those storing higher-value personal watercraft. Covered or enclosed storage protects against UV exposure, weather, and theft. For boat and RV storage facilities that also accommodate jet skis and trailers, look for covered units with security access and adequate lane width.
What to Look for in a Jet Ski Storage Facility
Not all storage facilities are built for trailer-mounted personal watercraft. Prioritize these features when evaluating your options:
- Covered or enclosed unit: Open lots offer no UV or weather protection. Covered storage options protect the hull and cover through the full off-season.
- Gated access and cameras: Security matters for vehicles stored for several months at a time.
- Space for a trailer: Jet skis on trailers typically need at least a standard RV-width space. General self-storage units are often too narrow.
- Power access: A battery tender needs power. Facilities without accessible outlets require battery removal and home storage of the battery.
RecNation Storage operates dedicated recreational vehicle storage facilities, including covered storage options sized for jet skis on trailers, across Arizona, Florida, Tennessee, Texas, and other states where the PWC season runs long.
How to De-Winterize a Jet Ski in Spring
De-winterization is simpler than winterization and takes most owners one to two hours. Work through these steps before your first ride:
- Reinstall or reconnect the fully charged battery. If it won’t hold a charge after conditioning on the battery tender, replace it before riding.
- Remove the exhaust plug or rag. Check that you have it before you try to start the engine.
- Check the fuel. Properly stabilized fuel should still be usable. Top off the tank if needed.
- Inspect the hull for any winter damage, stress cracks, or blistering.
- Connect the garden hose (open-loop systems) and run the engine through a full flush cycle.
- Check all cables, fittings, and the bilge for moisture or pests that may have entered over winter.
- Take a short test run close to shore before heading out for a full outing.
Signs Your Jet Ski Needs a Service Visit Before Spring Riding
Most skis come out of storage ready to ride with a straightforward de-winterization. Some need a shop visit first. Take the ski to a mechanic if you see any of these:
- Engine won’t start after battery reconnect and fuel check.
- Visible hull cracks or blistering that weren’t there last season.
- Unusual exhaust smoke color (white, black, or heavy blue) on startup.
- Battery that won’t hold a charge after conditioning.
- Rust on internal fittings visible at the bilge.
Final Thoughts on Winterizing Your Jet Ski
Once your jet ski is properly winterized, where it spends the off-season matters almost as much as how carefully you prepared it. A quality cover and a dry, secure space protect everything you just invested time and money into.
If covered home storage isn’t an option, RecNation boat and RV storage offers dedicated facilities built for personal watercraft and trailers, so your ski stays protected until the season opens back up.
Frequently Asked Questions
What happens if you don’t winterize a jet ski?
If you skip winterization and temperatures drop below 40°F, water trapped in the cooling system can freeze and expand, cracking the engine block, exhaust manifold, or water lines. Repair costs for freeze damage typically run $1,500 to $3,000 or more. Even in warmer climates, sitting on untreated ethanol-blended fuel for months causes phase separation that clogs carburetors or fuel injectors.
Can I winterize my jet ski myself, or do I need a mechanic?
Most jet ski owners can winterize their own ski in three to four hours with basic hand tools and under $50 in supplies. The steps involve flushing the cooling system, fogging the engine, adding fuel stabilizer, removing the battery, and covering the ski. Professional winterization costs $350 to $750 and makes more sense for skis still under factory warranty or for owners who aren’t confident in the cooling system flush.
What products do I need to winterize a jet ski?
You’ll need marine-grade fuel stabilizer, fogging oil or fogging spray, non-toxic propylene glycol antifreeze (for models that require it), a battery tender, a garden hose with a flushing attachment for open-loop systems, a foam plug or rag for the exhaust, and a UV-resistant breathable jet ski cover. Total supply cost is typically under $50.
How much does it cost to winterize a jet ski professionally?
A marine dealership or PWC service shop typically charges $350 to $750, depending on the ski’s model, your region, and whether an oil change is included. Some shops offer a combined winterization and spring startup package. DIY winterization with purchased supplies generally costs under $50.
When should you winterize a jet ski?
Winterize your ski before temperatures in your area consistently drop below 40°F, or when you know you won’t be riding again for more than 30 days. In northern states, that typically means September or October. In southern states like Florida or Texas, the riding season runs longer, but owners should still add fuel stabilizer any time the ski will sit unused for more than a month.
How do you de-winterize a jet ski in spring?
Start by reconnecting the fully charged battery and removing the exhaust plug. Check the fuel level and condition. Inspect the hull for winter damage, then run the engine through a cooling system flush cycle using a garden hose (open-loop systems). Check all cables, the bilge, and fittings before taking the ski out for a short test run close to shore. The process takes one to two hours for most owners.